Avoid blurry photos, uneven lighting, and missed city magic! Learn the top mistakes to dodge for stunning urban night photography
‘It’s a grainy mess!’ is a phrase common among those who have attempted low-light photography. The lure of taking photos at night isn’t hard to see—moody cinematic cityscapes and streets, stunning nightscapes, painting with light, there’s a lot we can do as photographers once the sun sets.
However, navigating the challenges of low light can be one of the hardest tasks a photographer can face. To ensure that your post-shoot review doesn’t end in disappointment with cries of ‘It’s a grainy mess!’, let’s explore the top seven mistakes to avoid in night photography.
Mistake #1: Overcompensating with ISO
Let’s begin with a fundamental aspect of low-light photography: ISO settings. ISO measures your camera’s sensitivity to light. A lower setting, like 100 ISO, means that your sensor is less sensitive to light, making it perfect for well-lit conditions. On the other hand, a higher setting, such as 3200 ISO, increases sensitivity and is suitable for darker conditions.
In an ideal world, we would adjust our ISO according to our environment and go home happy knowing that have done another great job. However, the increase in ISO comes with a significant drawback: digital noise. This will not only compromise the overall quality but potentially obliterate details in our images, ultimately ruining the shot.
Noise reduction software can help, though sometimes an image can be too far gone and cannot be resurrected despite our best efforts. Therefore, we should attempt to take the cleanest shots possible saving us a great deal of pain.
A quick guide to best denoising software
learn moreGetting ISO right
Some cameras handle higher ISO settings better than others. Therefore, what works well for one photographer may not work for another.
Balance is key. In the darkest of conditions use a wide aperture and the slowest shutter speed that is practical for your subject. A helpful guideline is to use a shutter speed that matches or exceeds the reciprocal of your focal length when shooting without a tripod. Doing so ensures sharpness by minimizing shake while still capturing as much light as possible.
For example, if you are shooting with a 50mm lens, avoid dropping below 1/50 sec. I use a 70mm lens and keep it to a minimum of 1/80 sec. My aperture is set to its widest possible setting, again maximising how much light I can capture, (f/2.8 in my case), and then I adjust the ISO based on these settings.
When it feels like aperture and shutter speed still need help to correctly expose your scene, that’s your cue to increase your ISO. It’s about making incremental adjustments to strike the balance between achieving enough light and maintaining image quality.
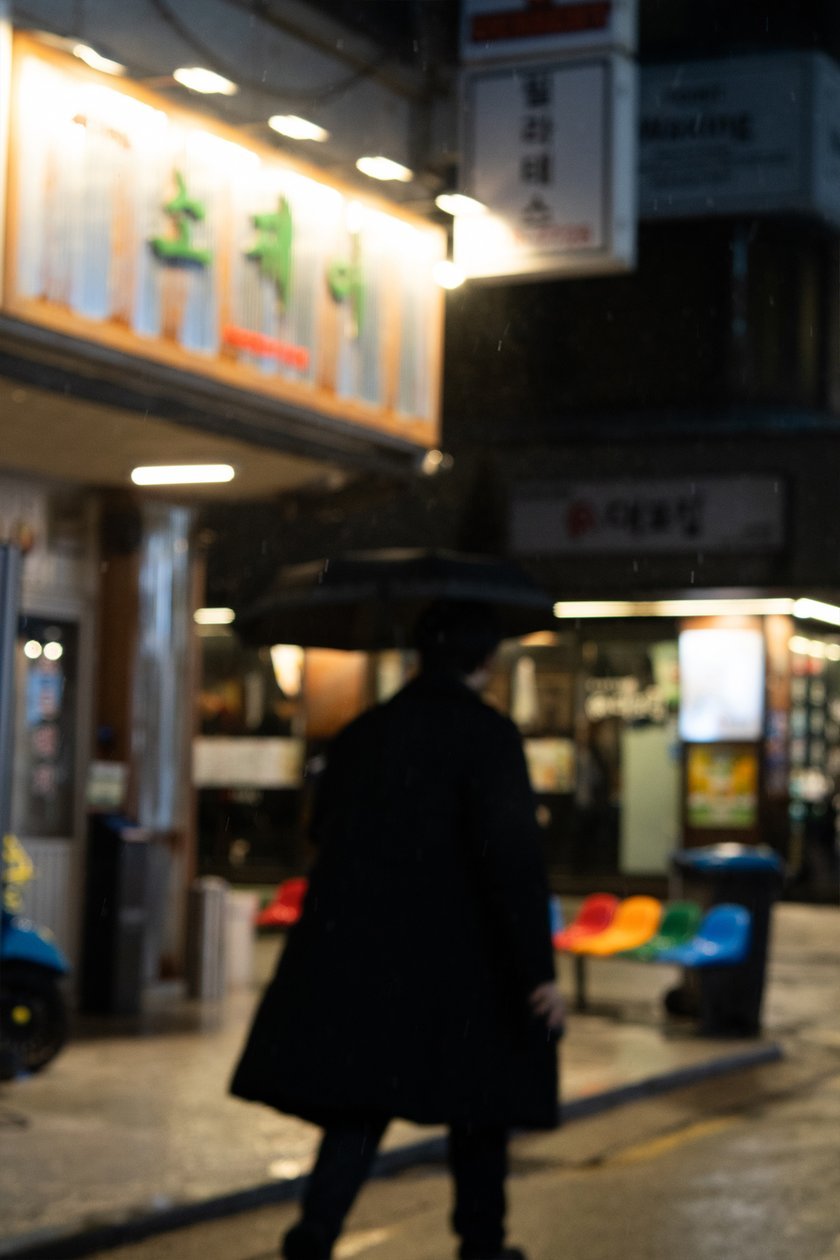
Mistake #2: Under- and Over-Exposing
First and foremost, ensure you are shooting in RAW mode for night photography. RAW files capture a broader dynamic range, meaning they retain more information in both highlights and shadows. This affords us a better chance of recovering details from these areas without introducing excessive noise or degradation, unlike with JPEGs.
Yet, RAW files still have their limits, and a poorly exposed image will reach beyond those limits resulting in a ruined shot. Overexposure will destroy details in your light sources, which, despite reducing highlights during post-processing, will appear as indistinct blobs of light. On the other hand, underexposure will force you to increase the exposure and shadows whilst editing, risking severe noise.
Instead, always adhere to this common phrase in photography: “Expose for the Highlights.” It is generally easier to rescue detail in underexposed areas of your image rather than overexposed. Once your highlights are blown out, that information is irretrievably lost, but you may be able to restore shadowy areas, just remember that too much may result in unwanted noise.
Mistake #3: Over-relying on Post-Processing
This brings us to our next point: “Hopefully, I can rescue this shot when I edit”. You want to save yourself as much time as possible when it comes to editing. Battling with noise and attempting to rescue blown-out light sources will ultimately waste your time and cause immense frustration.
With experience, you will gradually learn the limits of how much an image can be salvaged before even attempting to edit it. To minimize these headaches and wasted shots, focus on achieving the correct exposure from the start. Think of your RAW file as a set of ingredients and the editing process as cooking. Just as the quality of the ingredients affects the final dish, so does the quality of your initial capture affect the outcome of your photo. High-quality input leads to high-quality output.
Mistake #4: Ignoring White Balance

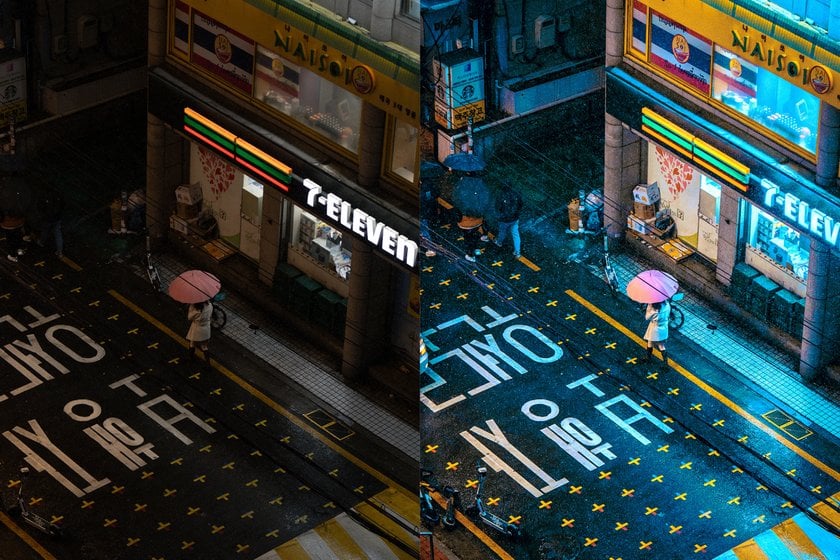
Automatic white balance might seem convenient, but it can be detrimental to your night photography shoot. Diverse sources of light can mislead your camera’s white balance causing colour temperature shifts throughout the shoot and resulting in inconsistent colour tones.
White balance aims to portray colours accurately, compensating for the colour temperature of light sources. From the sun to LEDs, light can change the colour of white objects in your image. When out shooting at night, a light source may suddenly cause your camera to skew towards unnatural-looking warmer tones. That being said, white balance can also be used as a creative tool and you can adjust those settings to match the mood you are striving for in your image.
Typically, I keep the white balance set to a cooler tone to create moodier night street shots. Either way, it is crucial to take control of this setting to ensure consistency throughout the shoot with the mood you are aiming for.
Simple Steps to Change the Colour of Any Image
Learn TodayMistake #5: Neglecting the Importance of Manual Focus
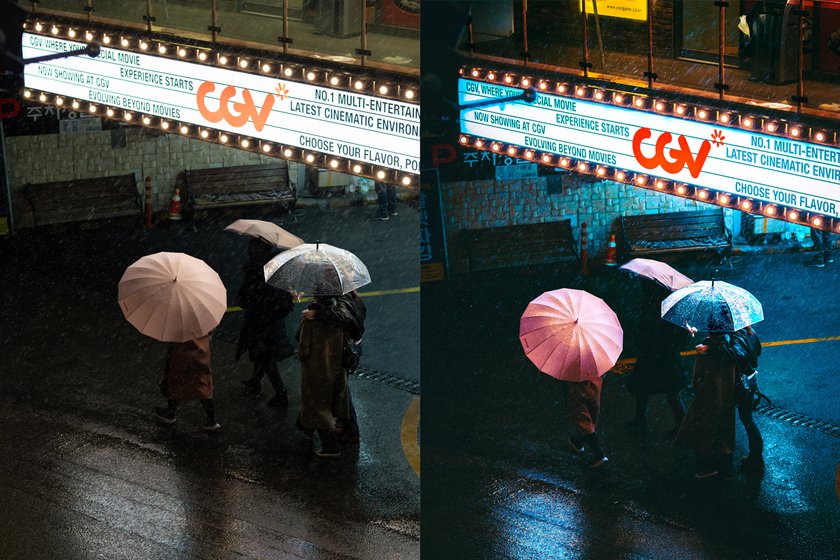
In low-light conditions, it can be hard for your camera to detect contrast, which is how many autofocus systems work. Exposing your shot correctly will increase the effectiveness of auto-focus, but sometimes it is not enough. It will hunt around your dimly lit scene looking for your subject, meaning that those fleeting moments you are attempting to capture may have been missed. Moreover, because we tend to use wide apertures in low-light conditions it is much easier to miss our intended target due to a narrowed depth of field.
Relying on autofocus may result in missed shots; sometimes investing a few extra moments to manually focus on your subject pays off significantly. Instead of your camera locking on to the brightest point in your image, precisely focus your lens to bring out the details and subject you are attempting to capture.
Most modern-day cameras are equipped with Focus Magnification and Focus Peaking, both being a huge aid in low-light environments. Focus Magnification zooms in a great deal for you to see more clearly what you are focusing on, providing a clearer view for precise focusing. However, if your intended subject is dimly lit you may not be able to distinguish easily if it is in focus or not. That’s when we can use Focus Peaking. Focus Peaking will highlight your focused areas in a distinct colour allowing you to clearly distinguish them.
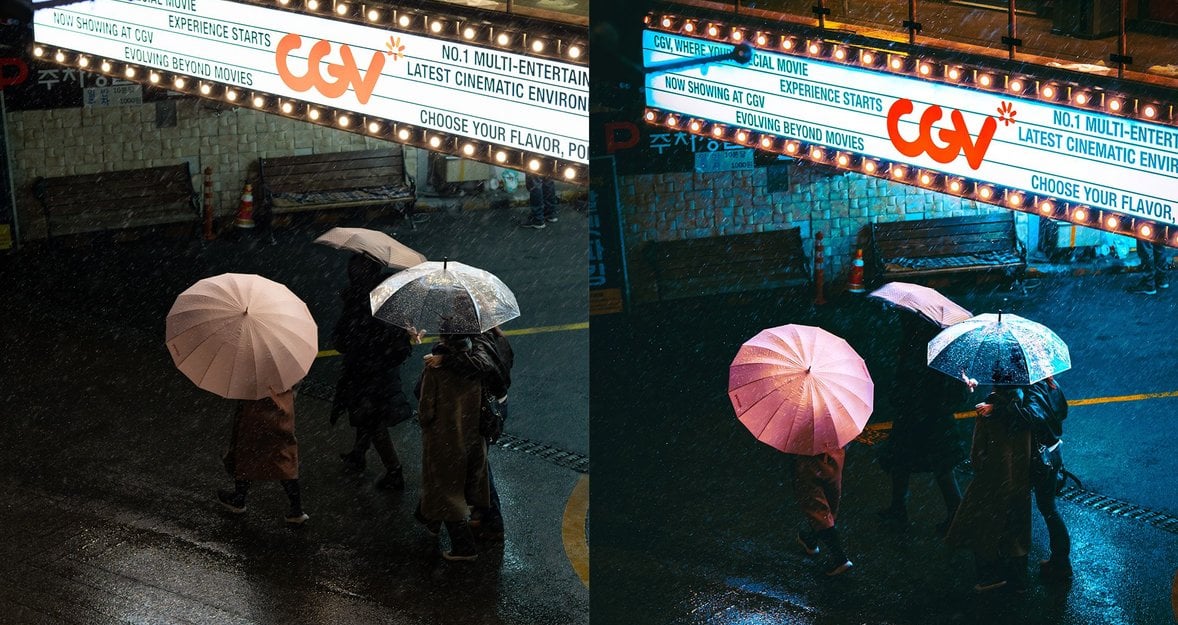
 In this case, auto-focus chose to focus on raindrops instead of my subject. Which, whilst quite impressive, is not the result I wanted.
Using both of these tools together will help you overcome the challenges that auto-focus can present in night photography. Remember that correctly exposing your image will help with your autofocusing a great deal, but try to quickly recognise if you’re having difficulty, at which point switch to manual.
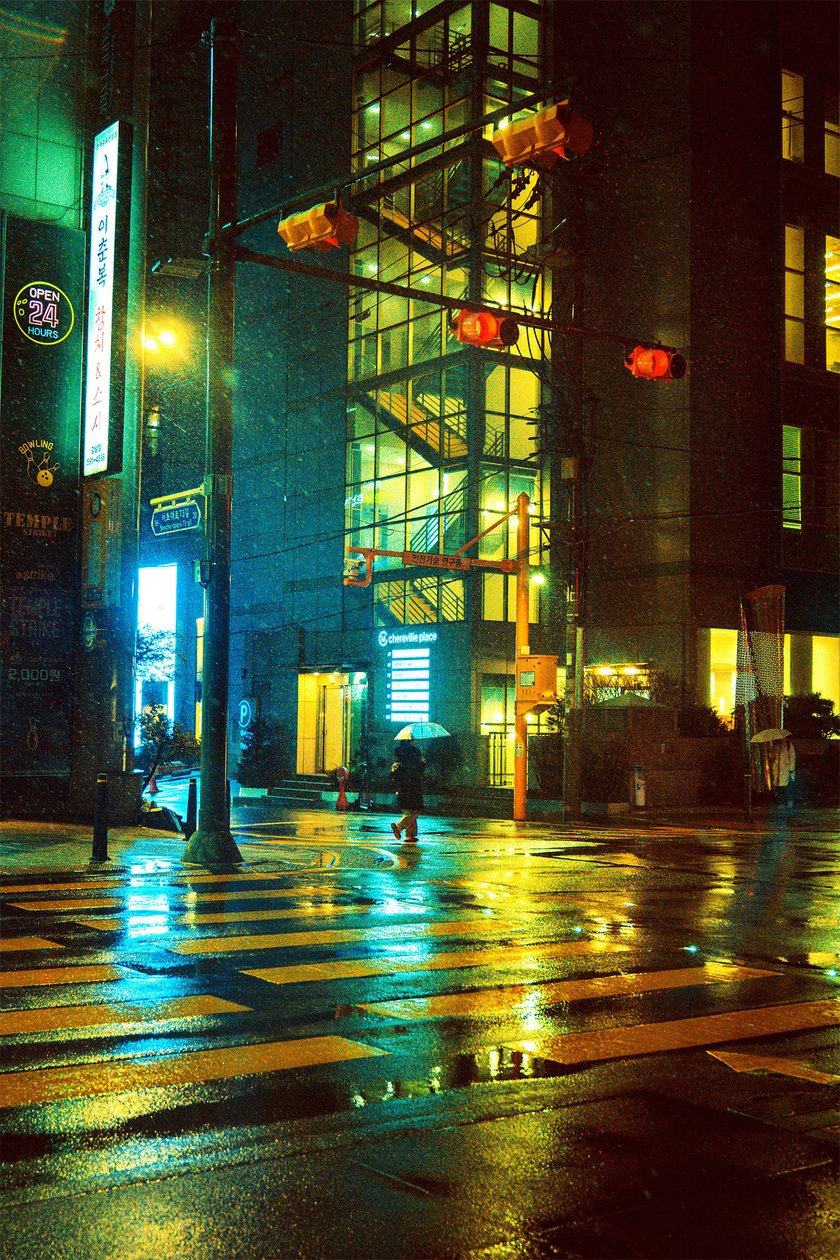
Mistake #6: Underestimating Light Pollution
If you live in a major city and have looked up at the night sky on a clear evening you will know full well the impact of light pollution. Stars are barely visible, and any attempt to practice astrophotography becomes extraordinarily difficult, which is why astrophotographers prefer to shoot in rural and isolated areas where light pollution is minimal or non-existent. Light pollution also represents challenges in urban environments.
If you are attempting to capture a cityscape shot on a cloudy night, light pollution can result in washed-out skies and also lead to white balance issues as the clouds reflect light from below. There is a distinct lack of contrast between the sky and the city which can diminish the quality of your image. If waiting for a clearer night to shoot isn’t an option, selective brushes can be invaluable for the editing process. They will allow you to isolate the sky within your image, enabling you to enhance the contrast, adjust white balance, correct colours and eliminate any unwanted colour cast.
Clearer nights in the city will result in better images with the sky appearing darker and more distinct from the urban landscape. Nevertheless, extra care will still need to be given during post-processing, notably, contrast and white balance. Of course, keep your expectations reasonable as capturing any stars in your image will still be challenging.
You can, however, get creative with your shot and use Luminar Neo’s Sky Replacement tool which has a variety of night skies to choose from enabling you to artistically enhance your urban landscapes.
Mistake #7: Failing to Experiment
Night photography is all about adapting. The settings that work well on one street, may not be effective on the next, as the quality and quantity of light sources will vary greatly from one spot to another. Therefore, you must keep focused and continually adjust your settings to suit the scene before you.
As your experience in night photography increases, you will begin to quickly judge for yourself how much ISO is needed from one environment to another. That is why experimenting with your camera and understanding its capabilities will significantly improve your night photography.
It is worth understanding that you are unlikely to walk away from your first few shoots with more than a handful of good shots. But that is where the excitement comes from this style. Embrace the learning process and gradually you’ll see the number of good shots from a single session increase, allowing you to measure how far you have come and how much you have learnt.
The Bottom Line
The key to mastering night photography involves both continual experimentation and a solid grasp of its core principles. Understanding these fundamentals will greatly increase your skills and ensure that you improve with each shoot.
Shooting in RAW mode is another piece of essential advice so that you have as much flexibility as possible during the editing phase enabling you to extract every possible detail from your shots.
On clear nights or rainy nights, night photography provides an environment for you to create deeply atmospheric scenes, where moody cinematic tones or the vibrancy of night lights captivate your audience. So when the sun sets, grab your camera and start shooting.